To create a project a previously defined block needs to be loaded. To do so go to File > Load Block.
Once a block is loaded a new project can be defined under Edit > Create new Project. The following dialog box opens:
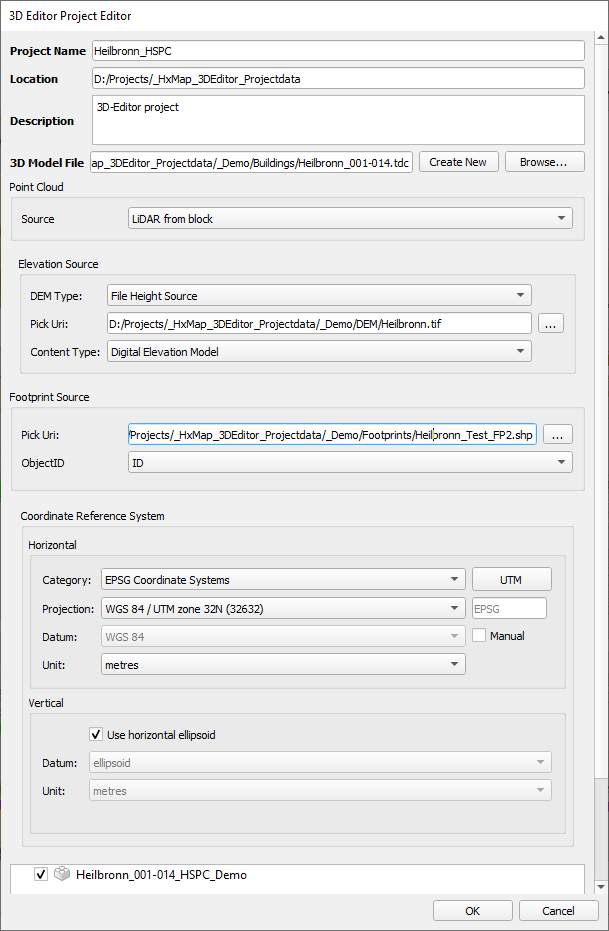
|
Project Name: Define your project name Location: Define location where your project will be saved Project File: Preview of the project file based on your inputs Description: Add a description for your project Geometry File: Either select or create a new tdc-file which will store the building geometry Point Cloud: Add point clouds from the block or from an external source to support editing Elevation Source: Define the elevation source to be used for the 3D Editor project Footprint Source: Define the building footprint source (if applicable) for possible footprint intersection belong together with the ObjectID Reference System: Define the reference system to be used for the 3D Editor project Block selection: Select the block that contains the processed data you want to use when editing building geometries |
After confirming your inputs, your 3D Editor project will be created.