Running Lidar QC jobs
In addition to evaluating a point cloud manually, HxMap also provides the option to evaluate point clouds for a project in a more automated approach. This can be done by defining and executing a new Lidar QC job within a HxMap project.
Creating a Lidar QC job
Within your defined project, select the data from the block that you want to use as input for your Lidar QC job. Creating a Lidar QC job from a block outside of a project is not supported.
Selecting a previously defined AOI will limit the Lidar QC job to this area. If multiple AOIs are selected, processing is reduced to a minimum bounding rectangle that covers all selected AOI polygons.
Select ‘Create Lidar QC Job' from the ‘Tools’ menu and go through the wizard to add required information:
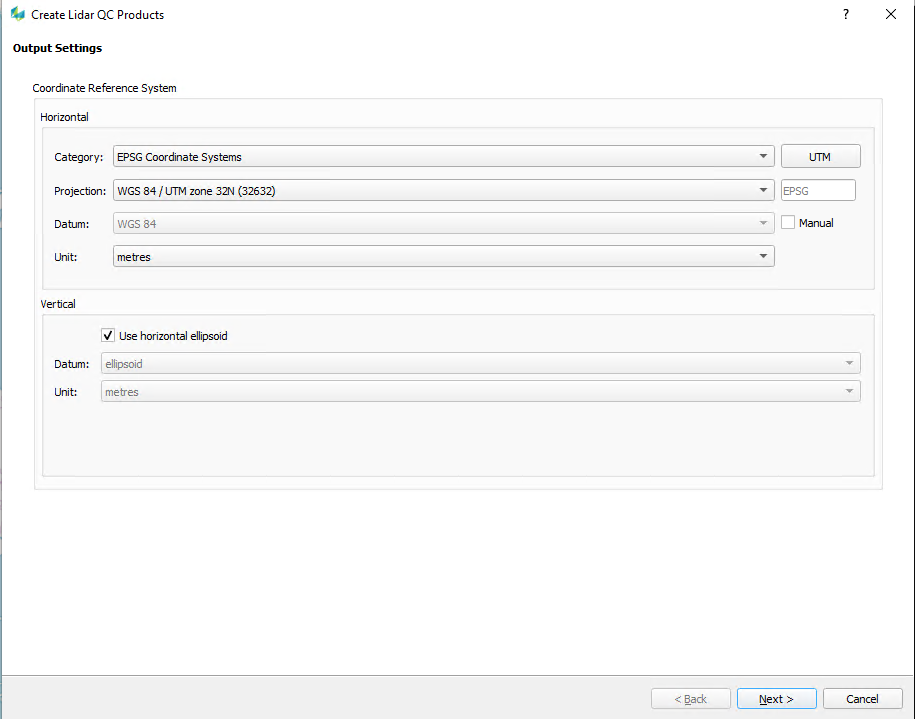
Output Setting
The first page of the wizard that opens allows specifying the coordinate reference system for the output.
A user is expected to define the raster coordinate system. The horizontal unit is synchronized with the cell size on the later page and the vertical unit defines the Elevation raster and the results unit.
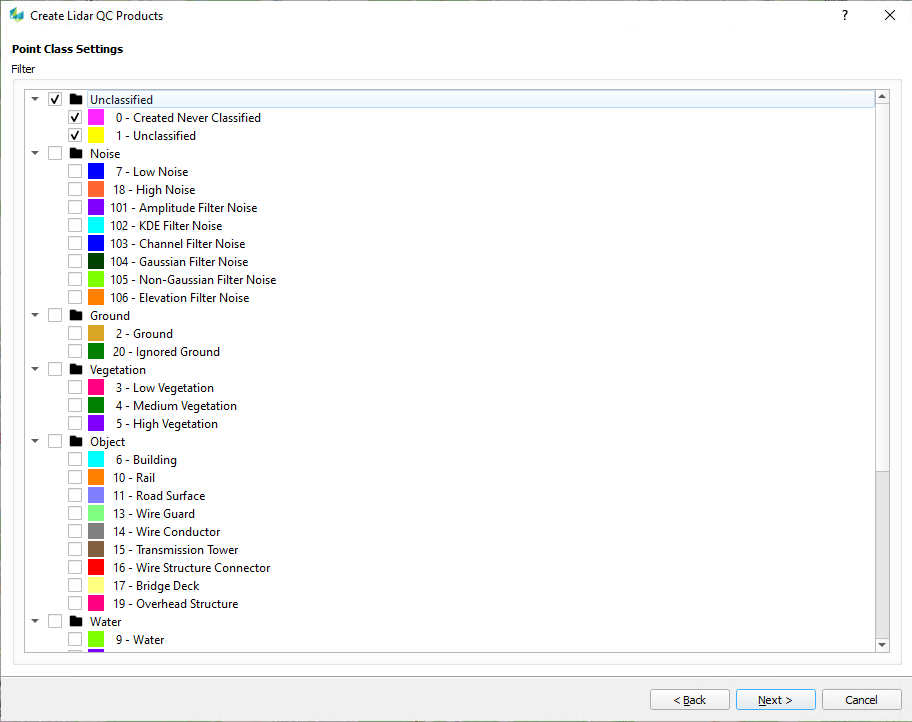
Point Class Settings
All computations will use the same input point cloud. The following page gives the possibility to select which point classes to either include or exclude. Select all point classes that should be considered for the evaluation.
Raster and Product Settings
On this page, settings for the generation of the individual QC raster and the QC products can be defined.
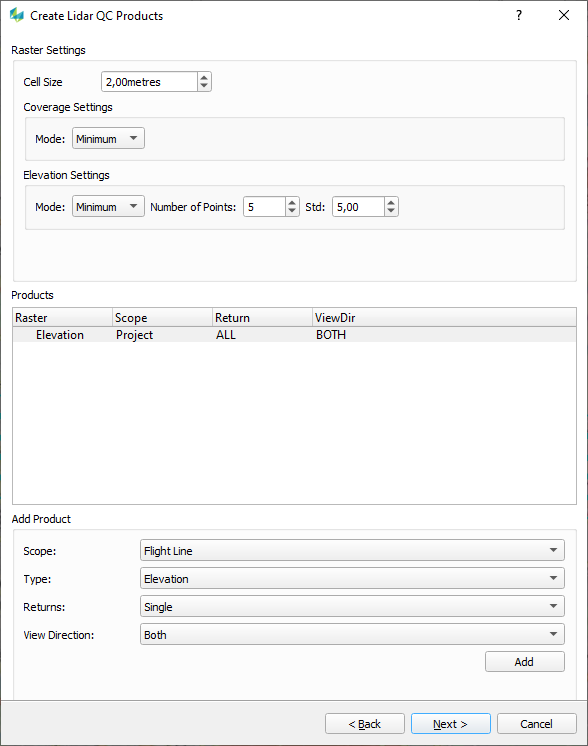
Raster Settings:
1. Cell Size: Define the cell size to use for all raster, the unit is synchronized with the coordinate system horizontal unit;
2. Coverage Mode: Computational modes for coverage raster: Min, Max, Average, Median
3. Elevation Mode: Computational modes for elevation raster: Min, Max, Average, Median
4. Num of Points: Minimum number of points for a valid cell for Elevation raster, if less than the threshold, the pixel will be set to invalid (no data), set to 0 to ignore this option
5. Std: Maximum elevation std for a valid cell for Elevation raster, if all points from the cell having a std larger than the threshold, the pixel will be set to invalid (no data), set to 0 to ignore this option.Scope: Compute the Lidar QC raster on a Flight Line or Project level
Type:
Point Density: Point Density raster
Coverage: Coverage raster
Elevation: Elevation raster
Elevation Comparison: Computes differences between generated Elevation raster
Returns:
All: Use all returns
First: Use First return only
Last: Use Last return only
Single: Use Single return only
View Direction
Both: Use both scanning directions
Positive: Use positive scanning direction only
Negative: Use negative scanning direction only
Notes:
Users can add specific rasters with a combination of the options to the list. Users can also right-click on the selected raster to remove certain items from the list.
Elevation comparison raster is dependent on the Elevation raster, if adding an elevation comparison raster for the FlightLine or Project, the corresponding Elevation rasters will be added to the list automatically, these rasters in the list will be unable to remove until the depending condition breaks by removing the elevation comparison raster first.
Due to the possibility of partial selection of all possible points classes, the return numbering for all points will be re-calculated before the raster generation to ensure accuracy.
Scanning Directions: the convention uses is according to ASPRS LAS specification.
Positive: scanning from Left side of swath to Right side of swath
Negative: scanning from Right side of swath to Left side of swath
Ground Control Points Settings
To evaluate ground control points, HxMap will use the LiDAR points at that given location and interpolate a surface to determine the height value at the position of the measured point.
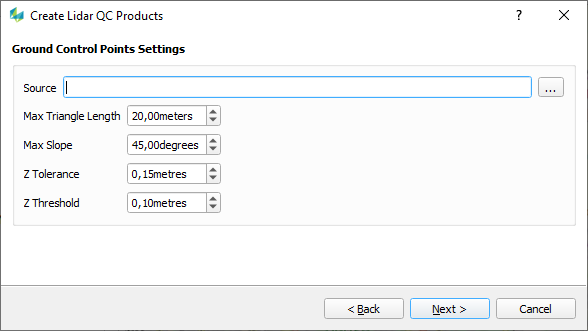
Source: Select the ground point file(*.hexgp) to use
Max Triangle Length: defines the maximal triangle length to use for creating the reference surface
Max Slope: defines the maximal slope angle to use for creating the reference surface
Z Tolerance: defines the maximal absolute dz to filter the outliers in GCP results. Points whose dz exceed this tolerance will not be shown in the report
Z Threshold: defines the threshold to highlight the GCP in the results
Submitting for Processing
With all the settings defined the QC job can then be sent for processing either on the local workstation or on the processing cluster. Additionally, a job name can be specified to distinguish this run from other Lidar QC jobs.
Evaluating QC Results
Once processing has finished, browse to the list of defined Jobs in the data source panel. Each job has additional runs that contain the QC information calculated. To load this information, right-click on a run and select ‘Load Results’.
Loading the results will automatically add the corresponding layers in the “Lidar QC” group of the layers panel:
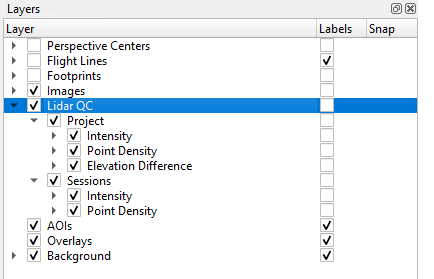
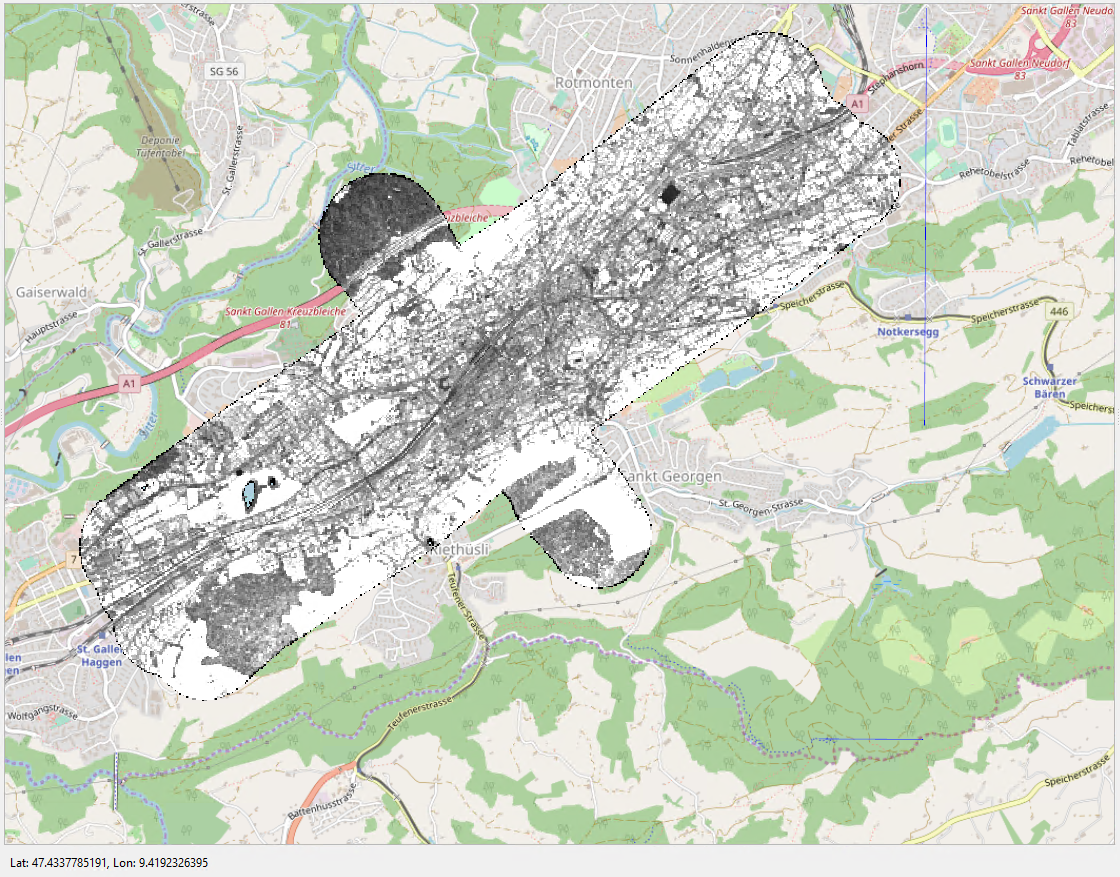
Each of these layers can be toggled individually and will be displayed in the main map view:
Adjusting the visualization style of a raster layer
HxMap provides a raster style editor to adjust the output style of generated raster. This raster style editor is available for each of the raster types (Intensity, Point Density, Elevation Difference) for both the project level as well as the session level.
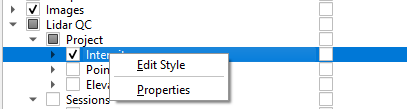
To open the raster style editor, right-click on the layer group and select ‘Edit Style’.
Functionality of the raster style editor depends on the information represented by the raster type:
Intensity Raster | Point Density Raster | Elevation Difference Raster |
|---|---|---|
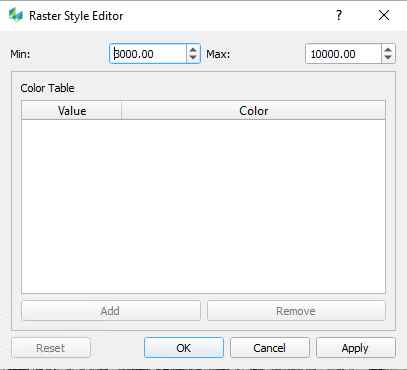 | 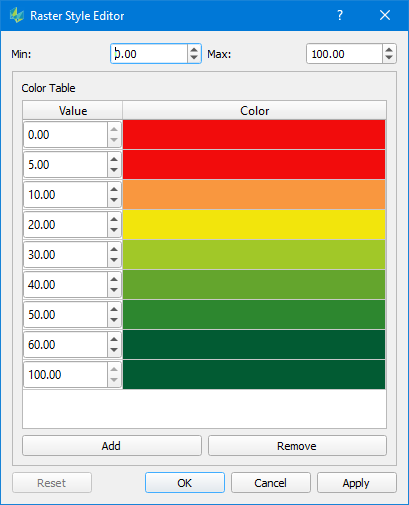 |  |
Uses gray scale to visualize pixel values. | Uses colors to represent pixel values. | Uses colors to represent pixel values. |
Minimum value and below = black | Minimum value and below = defined color (red) | Minimum value and below = defined color (red) |
One continuous grayscale ramp from Min. to Max. | Multiple color ramps defined through value/color pairs. | Multiple color ramps defined through value/color pairs. |
Use the Min / Max fields at the top to define the range of the ramp to apply. Note that values below the Min value will get the Min color and vice versa for the Max value and values above that threshold.
Modify the values by either typing in a new value or using the arrow buttons. Colors can be changed by clicking into the color field. Use the add/remove buttons to adjust the number of values. Adjusting is always done at the end of the list by adding another item before the last item or removing that item.
HxMap will create a color ramp between each of the step values. To achieve discrete coloring, it is therefore required to define a value/color pair for both the lower end as well as the upper end of a value range.
Generating a Lidar QC Report
When running a Lidar QC job, HxMap will automatically generate the raster products with the computed statistics and additional information at the specified output location. Lidar QC raster images are georeferenced so that they can be loaded directly into a third-party application.
Additionally, HxMap allows to generate a Lidar QC report which then also translates the computed values to their color representation using the currently defined raster styles.
To generate a Lidar QC report, select the results of your job run first, and then go to ‘Tools’ > ‘Generate Lidar QC Reports’. A dialog window then allows to specify the output directory and select the products to include in the report:
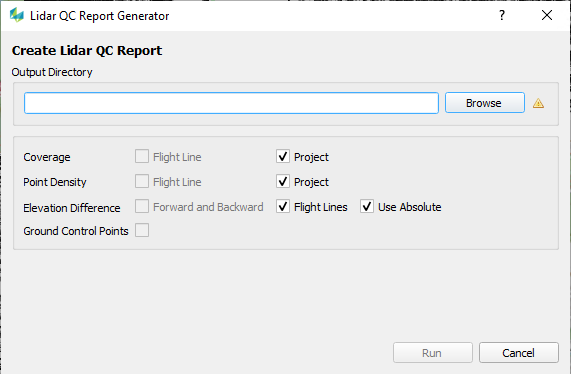
Click ‘Run’ to start generation. HxMap will then generate an HTML report at the specified location. To read the report, open the index.html file that was generated in your browser of choice. Within that page you will find navigation links that allow you to browse the results.