Running automatic point measurement
Start the triangulation workflow with the measurements of tie points. HxMap provides an automatic point measurement (APM) that has been tweaked to take advantage of the radiometry and geometry of the different sensors it supports without exposing too many parameters to the user.
HxMap requires an accurate GNSS/IMU trajectory as well as proper misalignment values in order to perform a fast and accurate APM.
For data that has been ingested using real-time navigation data it is recommended to update the georeferencing information using a post-processed trajectory.
Launching Automatic Point Measurement
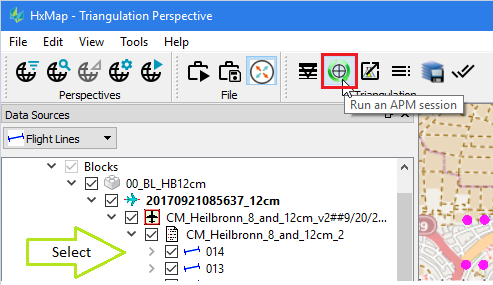
Select one or more strips to run APM on from the Data Source Tree and launch the APM from the toolbar:
This will launch the "Run APM" dialog, where the user can to review and modify APM settings.
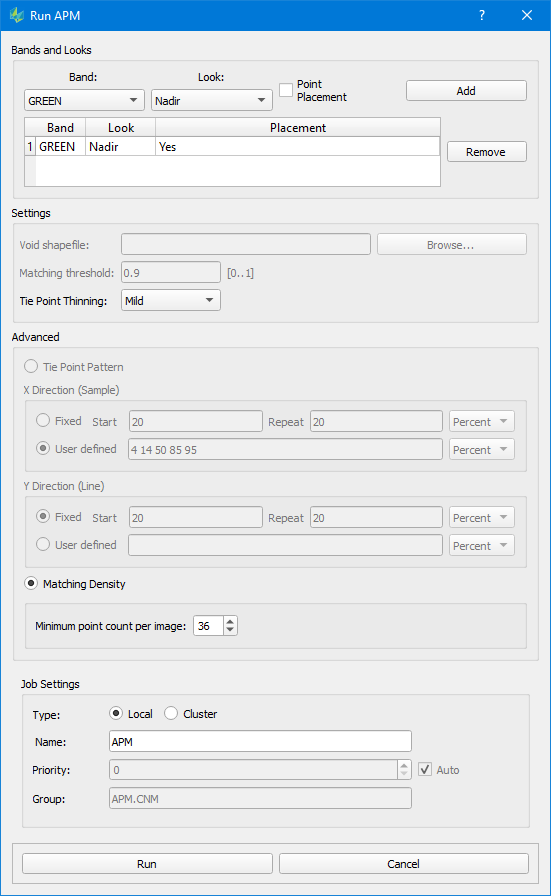
The HxMap automatic point matching runs on an area-based or feature-based point matching engine. The selection, which engine to use, is predefined per sensor. Only relevant settings for the engine will be activated in the dialog. A user can customize that selection in the INI file, where the different parameters for each engine are explained in the [APM] section.
Settings | Comment |
|---|---|
Band: Image band to use for matching |
|
Look: Image view angle to use for matching |
|
Point Placement: Search interest points in the image. |
|
Void Shapefile: Shape file that designates areas that should not be matched. |
|
Matching Threshold: The minimum cross correlation threshold to accept a point match ranges from 0.0 to 1.0. Only points with a quality higher than the threshold are kept. |
|
Tie Point Thinning: Automatically thin tie points at the end of matching.Strength of the automatic point thinning filter applied at final stage of APM |
|
Tie Point Pattern: The nominal pattern to identify interest points. (use dot as decimal separator and spaces between values) |
|
Matching Density: The number of interest points to be matched. |
|
Once all settings are reviewed, select "Run" to run the APM. Decide, whether to execute the APM process locally or on the cluster. As HxMap APM is processed in multiple stages, these steps can be distributed on a cluster to take advantage of the distributed computing platform. The APM stages are:
Placement (both engines): identify interest points in individual images
Transfer (area-based) - or - Pair Processing (feature-based): match interest points in neighbor images
Block Processing (feature-based only): match interest points between APM sub-blocks
Merge and Cleanup (both): merge measurements from different overlaps to the corresponding image point files.
After APM is finished, select the triangulation project via the Data source tree and use the right click context menu. The "Refresh" option will reload the project and display the generated points. The information is read from the block(s) where the tie point information is stored as *.ipb files.