Cut mosaic tiles
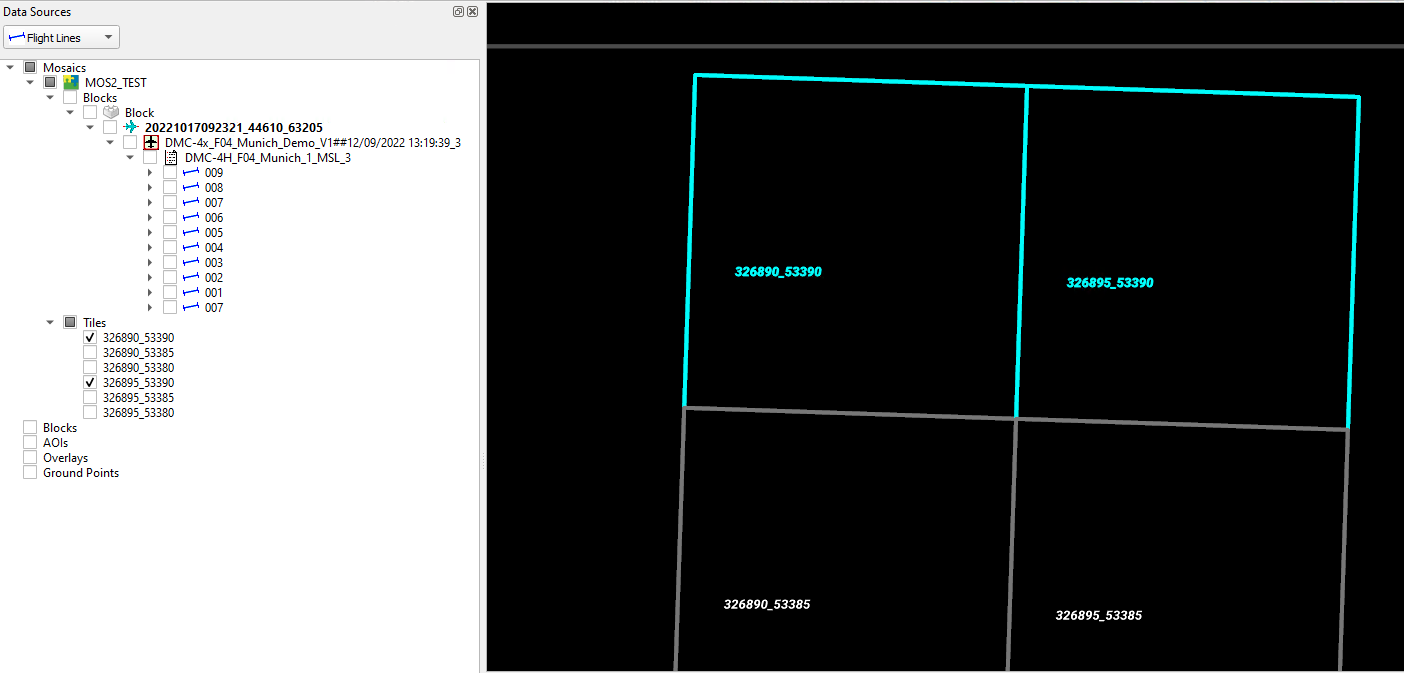
Once radiometry and seamlines in the mosaic are complete final tiles can be cut from the mosaic. Select tiles to cut from the Tile layer either in the Data Source or the Map Window.

Example of selected mosaic tiles for cutting
Use the "Run mosaic tile cutter" button available in the Mosaic toolbar to cut the selected tiles.

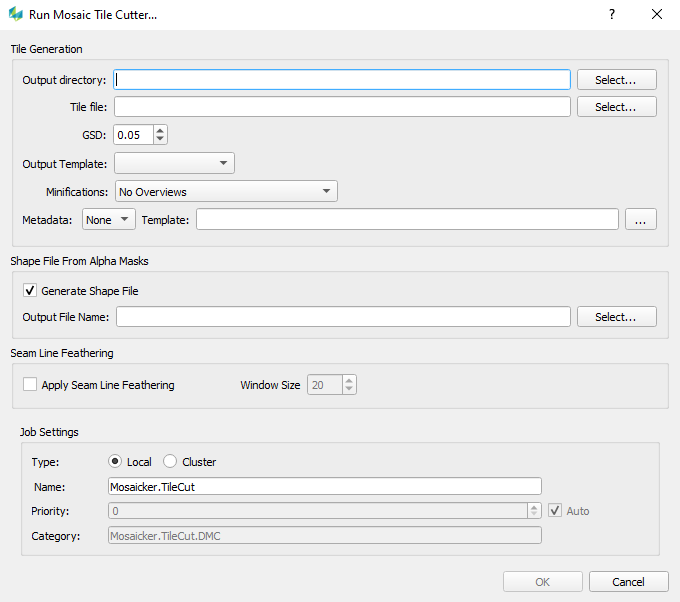
In the “Run Mosaic Tile Cutter” dialog user can configure settings for processing:

Output directory | (Required) Output directory where the tile files will be written. The chosen output directory must be empty. |
Tile File | (Required) Shows the tile definition file which was added to the project and lists the number of selected tiles. The tile definition file can be:
|
GSD | (Required) Defaults to GSD value of the Ortho product associated during mosaic initialization. Down sampling by factors of 2 of the Ortho GSD is supported i.e. Ortho GSD = 0.10m, Mosaic tile GSD = 0.20m |
Output template | (Required) Choose the Image output template to define tile image format |
Minification | (Optional) Generate image minifications for the tiles |
Shape File from alpha masks | (Optional) Export a polygon shape file of the mosaic seamlines |
Seamline feathering | (Optional) Apply feathering along the seamline during tile cut. The feathering is a gaussian blending applied over the Window Size defined. |
Once configuration is set click OK to begin processing as described Job Handling.