Creating a triangulation project
The first step in the triangulation workflow is to create a triangulation project from one or more blocks. The project will be used to run automatic point matching, import control points and run adjustment.
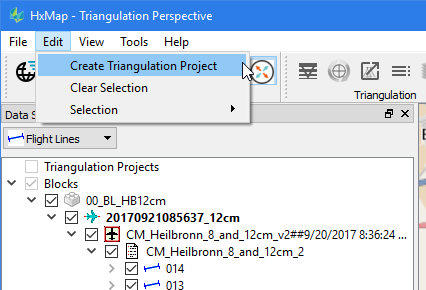
To do so, go to File > Load block. Pick one or more blocks that should be used for triangulation. Once they are loaded into the Data Source Tree, select the items you wish to triangulate. That may also be
just a few strips out of a block
just selected views, e.g. you may want to perform a separate triangulation for nadir images of a RCD30 Oblique
just selected bands, e.g you may want to perform a triangulation on high-resolution PAN images of a DMC III and transfer only results to low-resolution multispectral images
Select "Edit > Create triangulation project" from the menu bar at the top and enter the required attributes of the project as shown below.
Triangulation Project Definition | |
|---|---|
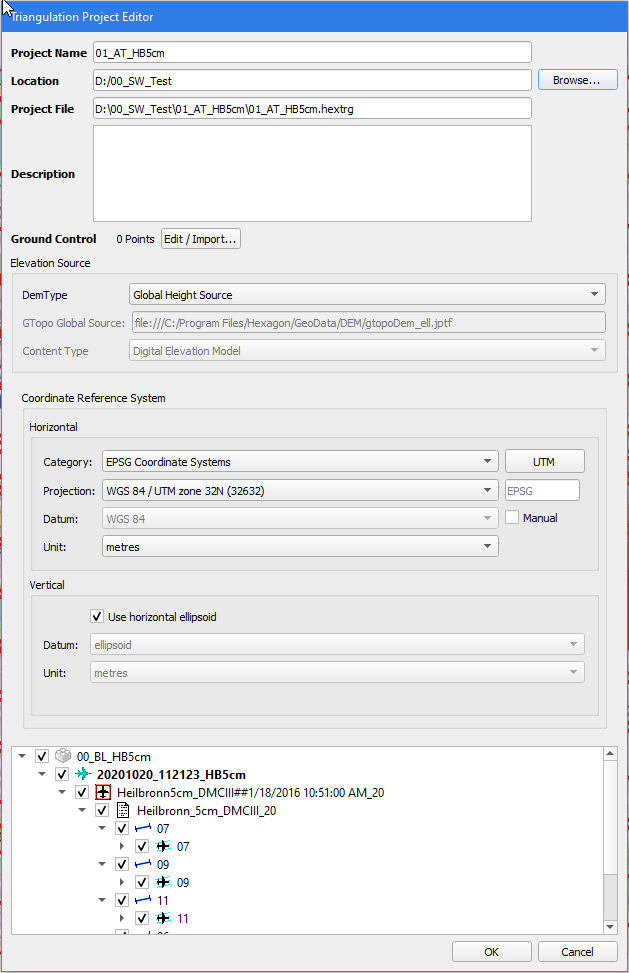 |
|
Import and Edit Ground Control Points
The dialog allows to import ground control points from different sources into the triangulation project:
Import … : opens an empty dialog where the user can browse to a custom file (txt or hexgp) with ground point information
Import All: opens a dialog and automatically adds all ground points that have previously been imported to the workflow manager
Import Selected: opens a dialog and adds all ground point files that are currently selected in the data source tree
Import “XYZ”: opens a dialog with ground points from that specific file
Once open, the user finds the same functionality as for managing ground points in general. In addition though the user can also set the usage of a point to either Control, Check or Tie Point.