Skip table of contents

Cut mosaic tiles

Once radiometry and seamlines in the mosaic are complete final tiles can be cut from the mosaic. Select tiles to cut from the Tile layer either in the Data Source or the Map Window.

Example of selected mosaic tiles for cutting

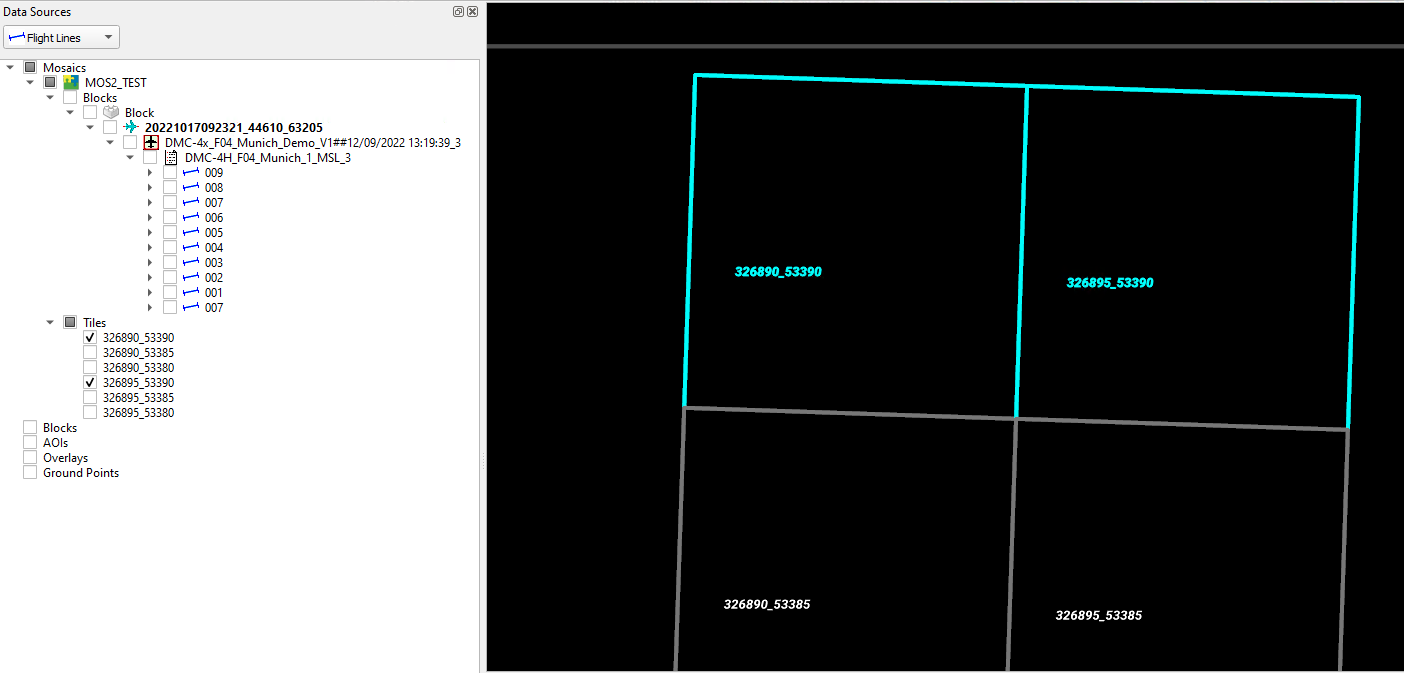
Use the "Run mosaic tile cutter" button available in the Mosaic toolbar to cut the selected tiles.

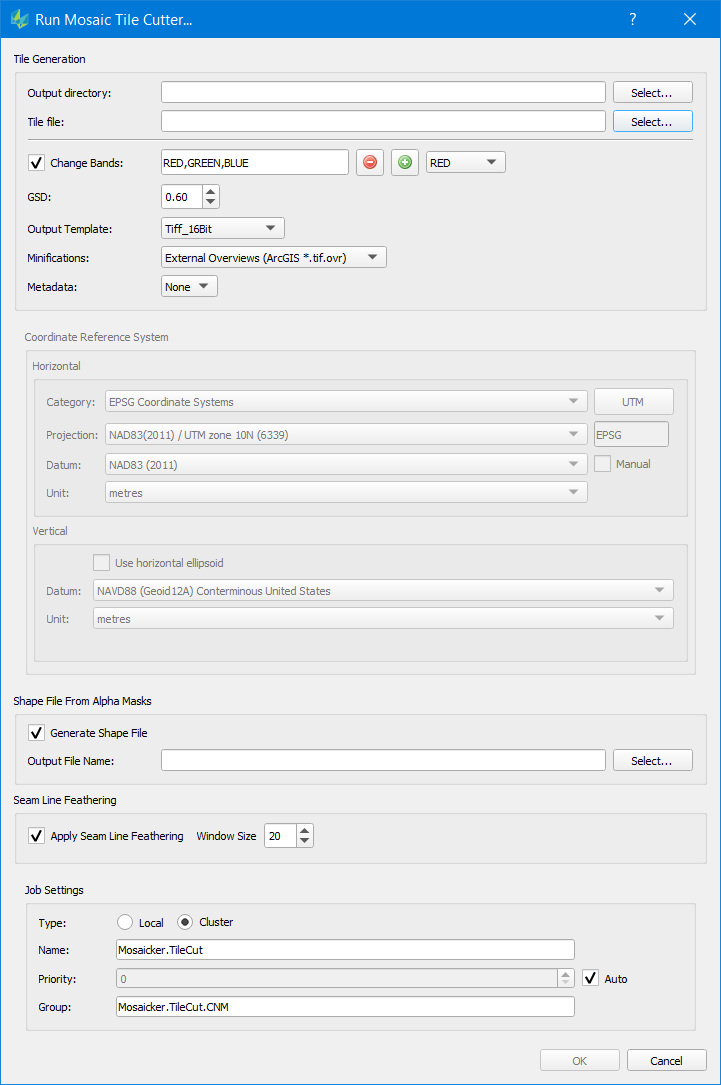
In the “Run Mosaic Tile Cutter” dialog user can configure settings for processing:

image-20250627-184018.png

Output directory

(Required) Output directory where the tile files will be written. The chosen output directory must be empty.

Tile File

(Required) Shows the tile definition file which was added to the project and lists the number of selected tiles. Optionally you can browse for a different tile file; in that case all tiles are selected.

The tile definition file can be:

  • a shape file containing multiple polygons used to define output boundaries for the tiles

    • the shape file must have an attribute named "MAPSHEET", it's value will be used to setup the file name for the tile.  (So if the MAPSHEET attribute for a tile polygon contains "Tile_1" as the string stored, the tile file will be named Tile_1.<output ext>).

    • the shape file must have a corresponding projection file (.prj) describing its coordinate reference system

    • its possible to reproject the mosaic coordinate system during tile cut by supplying a shapefile in a different projection than the HxMap project.

  • a text file containing one line per tile:

    • the format for defining a tile is: MAPSHEET UL_X UL_Y LR_X LR_Y

    • e.g. Ortho_RGB_0821132530103_0_349152_1312 11111.111 33333.333 22222.222 444444.444

    • the coordinate system of the text file is assumed to be the one used for Product Generation, no reprojection is possible

Reprojection during mosaic tile cut will require additional compute time compared to mosaic tile cut without reprojection.

  • Mosaic tile cutter works on the principle of pixel snapped tiles:

    • Tile dimensions must be given in whole GSD of the associated orthos e.g. the width and length of a tile represents a multiple of the GSD

    • Tile corner coordinates need to be divisible by whole GSD

  • Mosaic tile cutter can accept tile definitions which are not pixel snapped. In this case it automatically buffer the provided tiles out to the nearest whole pixel, ensuring the output mosaic tile image will completely cover the input tile definition geometry

Change Bands

(Optional) Reconfigure the mosaic number of bands and their order in the mosaic during tile cut.

  • Select and add bands one at a time, in the desired order for the output tiles

  • Example: from a single RGBN ortho mosaic, cut RGB and NRG (false color infrared) mosaic tiles in two separate tile cutter runs

GSD

(Required) Defaults to GSD value of the Ortho product associated during mosaic initialization.

Down sampling by factors of 2 of the Ortho GSD is supported i.e. Ortho GSD = 0.10m, Mosaic tile GSD = 0.20m

Output template

(Required) Choose the Image output template to define tile image format

Minification

(Optional) Generate image minifications for the tiles

Metadata

(Required) Set None or select ISO to populate a metadata template for each tile

Coordinate Reference System

(Required) The target coordinate reference system of the mosaic tiles. Coordinate reference system is not directly editable.

  • For shapefile tile definition this will be the coordinate system detected from the well known text string in its .prj file

  • For text tile definition file this will be the coordinate system of the mosaic’s associated ortho images

Shape File from alpha masks

(Optional) Export a polygon shape file of the mosaic seamlines

Seamline feathering

(Optional) Apply feathering along the seamline during tile cut. The feathering is a gaussian blending applied over the Window Size defined.

Once configuration is set click OK to begin processing as described in Job Handling.

JavaScript errors detected

Please note, these errors can depend on your browser setup.

If this problem persists, please contact our support.