Working with Layers
Fixed Layers
Each perspective has a number of fixed layers containing image or vector data that can be turned on or off. For Example, in the triangulation perspective the user can select the following layers to be displayed: Points, Perspective Centres, Image Footprints, Block Footprints, Trajectories, Triangulation Extents and Background. By default, all layers are turned on and the layers view is loaded on the top right of the Workflow Manager. The following shows an example where some layers are displayed in a triangulation perspective:
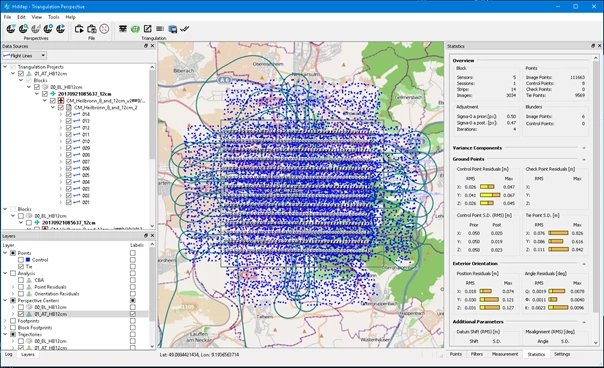
In the above example a block and a triangulation project based on the block are loaded in the triangulation perspective. Layers for Points, Perspective Centers and Trajectories from the triangulation project are enabled, in addition the Triangulation Extent and the OSM background are displayed. Note that the display order is always from bottom to up. This means that e.g. image footprints are drawn on top of the background layer.
Layer Controls
Map overview content is controlled by switching on/off the Layers. Also, Labels can be shown on map view by selecting 'Labels' check boxes.

Define style properties for a layer
Changing default styles
Each of the layers in HxMap will by default have a style assigned to it. If these styles are not to your liking, you can change them in the style section of the HxMap settings. Open the settings by going to ‘File’ > ‘Settings…' and then navigate to the ‘Styles/Layer Styles’ section as shown below:
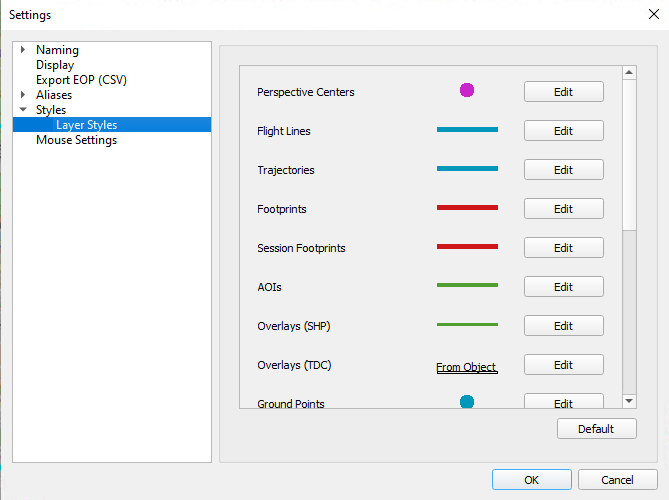
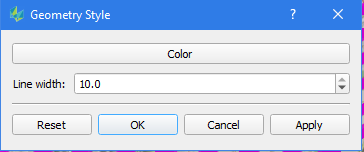
The list on the right will give you a preview from the current default styles set for various layers. Click the ‘Edit’ button next to it to open the vector style editor:
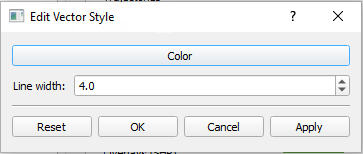
Use the color button to pick a new color to use or change the width of the feature. Clicking apply will update the preview of the style in the style list. Reset will revert changes back to the original HxMap application default. Click ‘OK’ to confirm your changes.
Clicking on the ‘Default’ button underneath the style list will reset all changes to the original HxMap application default.
Changes to the default layer styles are stored within your user setting. It is therefore possible for multiple users to run the same application but configure the default styles to their liking.
Changing styles for an individual layer
In addition to changing the HxMap defaults, a user can also change the style of an individual layer. To change this, first right-click on the layer you want to change and select the ‘Edit style’ option from the context menu.
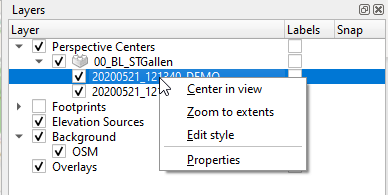
You will see the same style dialog as shown within the HxMap settings. Adjust the color and line width as wanted.
Clicking on ‘Reset’ will revert all custom styles and HxMap will use the user’s default styles as configured in the HxMap settings.
Styles for individual layers are stored within the workspace file. Be sure to save the workspace so that the same style is shown the next time you open the workspace.
Styles within the workspace overrule the styles defined in the HxMap setting. This allows to maintain a consistent style schema within a workspace, even if a user might have changed his default layer styles.