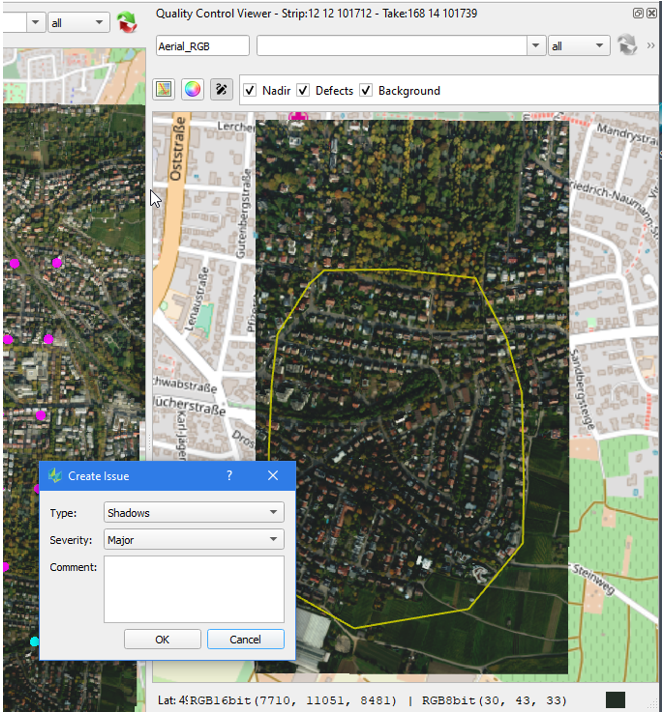
While performing QC of collected data, cases might occur where local quality drawbacks are noted, which require at least the user’s attention when preparing final products. It will be useful to pass this information to other team members or the end customer to force decisions or particular care in the subsequent workflow. Beside setting a QC state for complete takes, a user now also finds the option to draw polygons on captures or strip ortho and assign them a QC defect type. QC polygons are also linked to all captures intersecting the polygon and there QC state set to Rejected.
Draw QC polygons
To capture an issue with a polygon, follow the steps below.
|
Steps |
Example |
|---|---|
|
|
The QC information will be added to the sessions *_QC.xml.
QC state is only applied to data that is visible in the image QC viewer. Data that is hidden either by a filter or because of the selected product template will not be linked against the QC polygon drawn.
Display QC polygons
The drawn QC polygons are added as a Layer which can be displayed in the map view of the different perspectives. The QC layer can be styled by the defect types which are assigned during polygon creation.
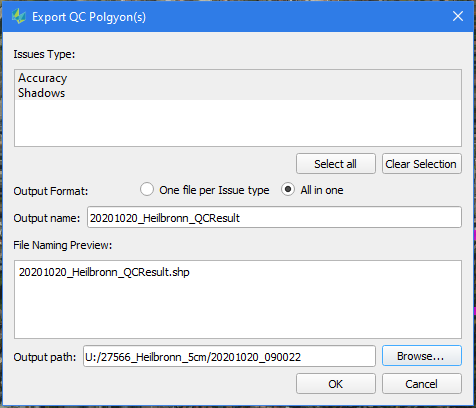
Export QC polygons
Once a user finalized the image and lidar quality control, the gathered information can be shared in the form of a shape file for further use outside of HxMap. Select the desired item in the data source tree and go to
Tools > Export QC Polygons
The upcoming dialog allows to specify the Issue types to be exported, to export into one or separate files per Issue as well as output file name and path:
Delete QC polygons
Two options exist to delete QC polygons within the image or Lidar viewer:
-
directly right-click on a polygon and select “Delete this polygon”
-
select polygons in the viewer first and then right-click on one of the selected polygons and select “Delete selected polygons”
When deleting polygons HxMap will automatically delete the polygons and remove any capture issue links that are related to this polygon. In case there are no more defects associated with the capture(s), their QC status will also be reset to Unknown state.