Perspective Layout
Each perspective consists of multiple elements that allow the user to perform required tasks. The central map view is the main element which is complemented by additional panels that can be activated/deactivated through the “View” menu of the perspective.
All panels can be detached from the main window and moved to another position within the Workflow Manager or left detached (e.g., on a secondary monitor).

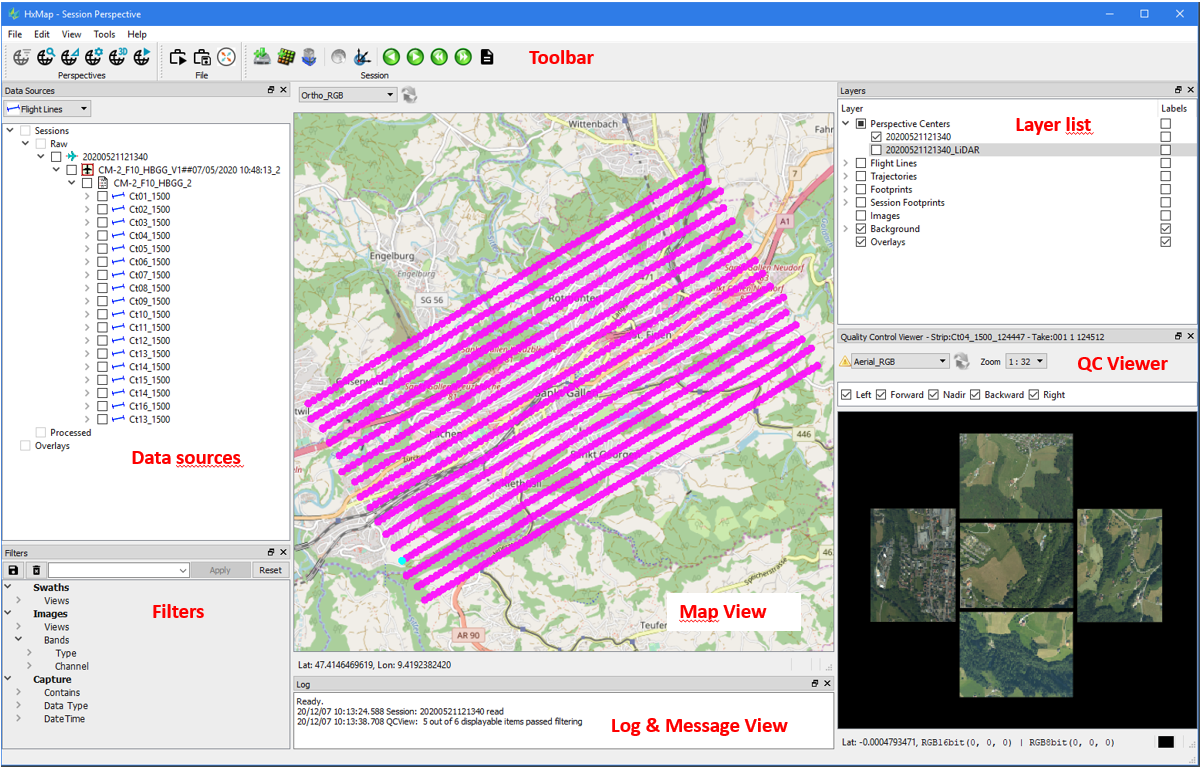
Screenshot showing the main elements of a perspective
Map view
The map view is the central element of each perspective. It allows to display collected data in a spatial context (location, flight layout, etc.).
Using the list of active layers, the map view will take data available in the data source tree and use the selected product template for data visualization.
An additional background base map can be activated in the layers. By default, HxMap will use an OpenStreetMap layer, but a user can change this to a custom WMS/WMTS service in the hxmap.ini.
Toolbar
From the toolbar a user can reach the most common functionality required for processing data inside the selected perspective.
Commonly the toolbar provides access to:
Switching to other perspectives
Loading/Saving Workspaces
Any frequent tasks required within the perspective
Data sources
Through the data source panel, a user can manage data currently loaded into the perspective.
Loaded data can then be either visualized in the map view or used for processing and executing tasks.
Filters
The filter panel allows to reduce the data loaded in WFM using various filter criteria. Data that is filtered out will no longer be listed in the data source window and is then also no longer available for visualization or processing.
Layers
The layers panel allows to adjust the way data is visualized in the central map view. Different to the filters panel, any data deactivated is only hidden from visualization but will remain in the data source tree.
Log window
HxMap will use the log window to display any kind of application messages (notifications, warnings & errors) to the user. It is therefore a good place to check if processes fail or take longer than expected.
Perspective dependent panels
In addition to the common panels, any perspective can have additional panels adding additional functionality for this workflow step. The example above shows the image viewer which is part of the session and QC perspective, allowing the user to load and view collected imagery one take at a time. As with all panels, these perspective dependent panels can be activated through the “View” menu and can also be detached and moved around to the liking of the user.